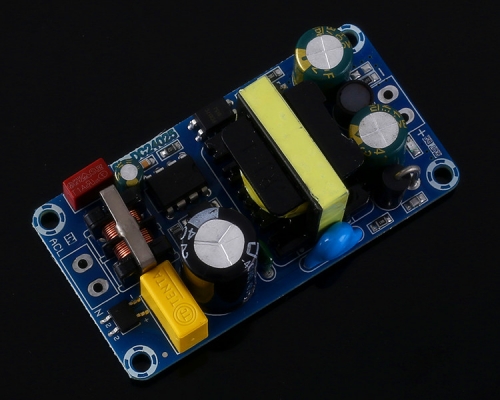
DC 12V Power-ON/OFF Trigger Delay Controller Module Adjustable Timer Cycle Delay Switch Module
$7.99
Item ID: GY18280
Product Details
1.Description:
It is a DC 12V power trigger delay controller module. It uses brand new original components,which can be used for industrial control,electronic equipment control,household appliance control, and intelligent application control.
2.Feature:
1>.It has a variety of working modes that can be adjusted.
2>.It can adjust the time shift.
3>.It is widely used.
4>.It has multiple connection methods.
5>.It has a digital display.
3.Description:
1>.Product Name:DC 12V Power Trigger Delay Controller Module
2>.Power Supply Voltage:DC 7V~12V
3>.Output Voltage:DC 0V~30V
4>.Output Current:8A
5>.Work Mode:Trigger work,delay work,power-on delay,cycle delay
6>.Work Temperature:-25℃~85℃
7>.Work Humidity:5%~95%RH
8>.Size:57*47*20mm
4.Button Function and Display Operation Instructions
▲K1 Key: This key is the work mode switching key. The work mode is divided into main mode and sub mode.
★ Main mode switching method:
After pressing the K1 key for 3 seconds,the digital tube will display the current working mode such as "P-1". Release the key at this time.
If you want to select another mode, press K1 once and release it,and it will display "P- 2",so it is switched to mode 2.
There are 5 main working modes. After selecting the mode,press the K2 key again to confirm that the current mode is used as the working mode.
★Sub-mode switching method:
When in normal work and without timing, short press the K1 key once to switch the current sub-mode. For example,the sub-modes in main mode 1 have P1.1/P1.2/P1.3,and each press is Switch among these 3 modes, and it will automatically exit and enter the normal working state after displaying for 1s.
▲K2 Key: This key is used as confirmation key and shift key.
★When selecting the main mode, press the K2 key to confirm the selection and exit the main mode selection.
★When the K2 key is pressed during normal work or without timing,the digital tube will start to flash from the first digit on the left,indicating that the time can be adjusted at this time.
★Press the K2 key again to move to the second digit and flash to adjust the second digit Number, indicating that the current time can be adjusted.
▲K3 Key:This key is the time adjustment key and the decimal point (time unit) selection.
★When a certain digital tube flashes, it means that the time can be adjusted. At this time,press the K3 key,the number will increase,and the time will be adjusted.
★When working normally And when there is no timing,press the K3 key once,the decimal point will move to realize the unit switch.
5.Working Mode Description
1>.P-1 Main Mode:The signal triggers the relay to close,and the relay is disconnected when the T1 time is up
1.1>.P1.1:Triggered again is invalid
1.2>.P1.2:Trigger again to re-time
1.3>.P1.3:Trigger the relay again to reset and terminate the timing
2>.P-2 Main Mode:Signal trigger starts timing time T1,when the time is up,the relay is closed,time T2 is disconnected (reset)
1.1>.P2.1:Triggered again is invalid
1.2>.P2.2:Trigger again to re-time
1.3>.P2.3:Trigger the relay again to reset and terminate the timing
3>.P-3 Main Mode:Cyclic use,turn on T1,turn off T2,endless loop.T1 and T2 time are adjustable.
1.1>.P3.1:The relay is turned on immediately after power on
1.2>.P3.2:The relay is off by default after power-on
4>.P-4 Main Mode:When there is a signal,the relay will be closed and kept closed,the signal disappears,start timing,the time is up,the relay is disconnected.During the delay,the signal is given again,the delay is cancelled,the relay is maintained,and the signal disappears To restart timing.
5>.P-5 Main Mode:Turn on or off after power-on delay,and it can work again after power off.
1.1>.P5.1:The switch is closed after power-on,and the switch is opened after T1 time is up.
1.2>.P5.2:The switch is open by default after power-on,and the switch is closed after T1 time is up.
1.3>.P5.3:The switch is open by default after power-on,and the switch is closed after T1 time is up.It will automatically open for 0.5s.
1.4>.P5.4:After the power is turned on,the switch is closed for 0.5s and automatically opens.After T1 time is up,the switch is closed for 0.5s and automatically opens.
6.Time Unit Selection Instructions:
1>.The time unit adopts different positions of the decimal point to switch to minutes or seconds.Use the K3 key to modify the position of the decimal point,so as to realize the switching of different units.
2>.When the decimal point is behind the tens digit or there is no decimal point,the time unit is seconds.For example,00.1 means 0.1 seconds.
3>.When the decimal point is after the single digit,the time unit is minutes.For example:001.It is 1 minute.
7.Receiving Operation Process:
1>.Turn on the power,long press K1 key for about 3 seconds to enter the working mode selection,and then click the K2 key to confirm the working mode.
2>.Press the K3 key to select the time unit.If there is no decimal point or the decimal point is in the second place,the unit is in seconds,and if there is a decimal point on the far right,it is in minutes.
3>.Click the K2 key to enter the time setting and shift to select the time position to be adjusted.
4>.When the digital tube is flashing,press the K3 key to add or subtract time.
5>.After setting the time of each bit,use K2 to move to the far right side to complete the setting.
8.Restore Factory Settings:
1>.Before turning on the power,keep pressing the K1 key without releasing it.Now turn on the power and keep pressing the K1 key for 2 seconds.
2>.Release the K1 key,disconnect the power again,and then reconnect the power to restore the initial settings.
9.Special Application:
1>.Trigger signal supports complete isolation-retrofit method
1.1>.Disconnect P5 solder joint
1.2>.The external trigger signal is soldered to the large TC pad,and the external GND is soldered to the TG.
10.Package:
1pcs DC 12V Power Trigger Delay Controller Module


